|
Downrigger Trolling for
Salmon
WHY FISH BITE,
Click Here
|
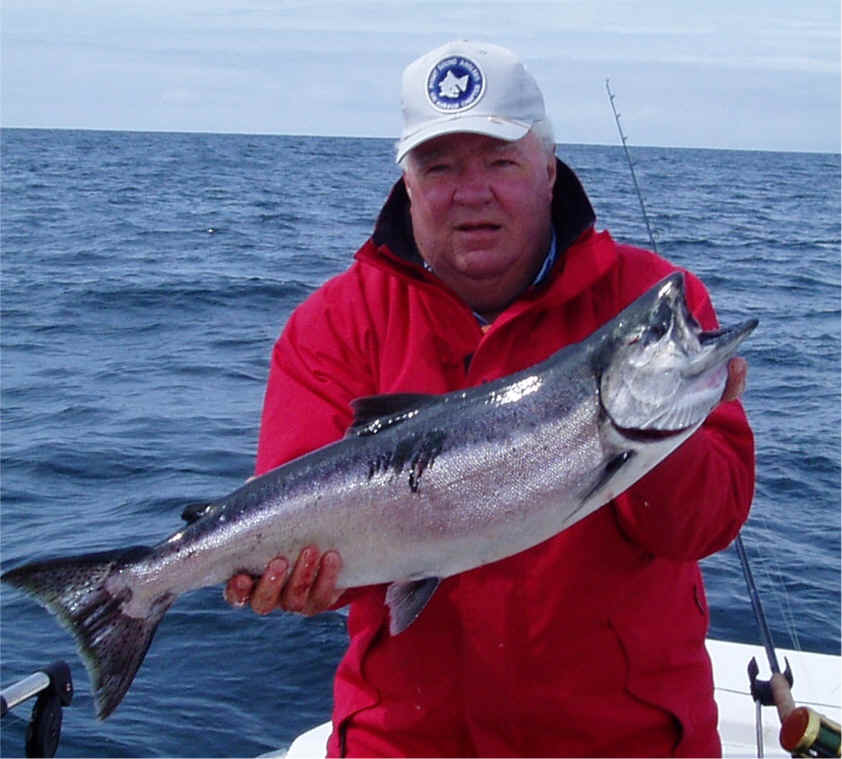
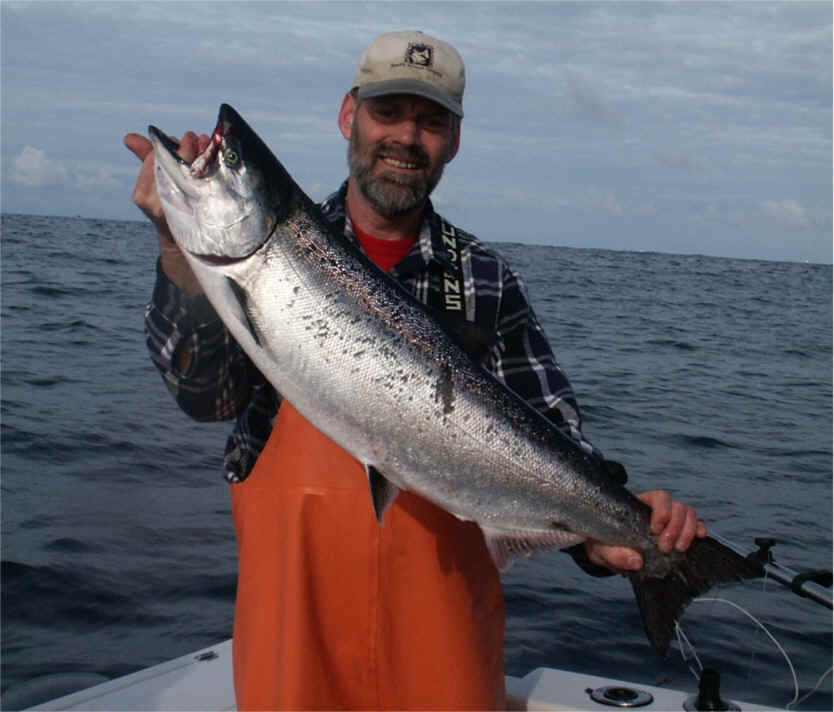
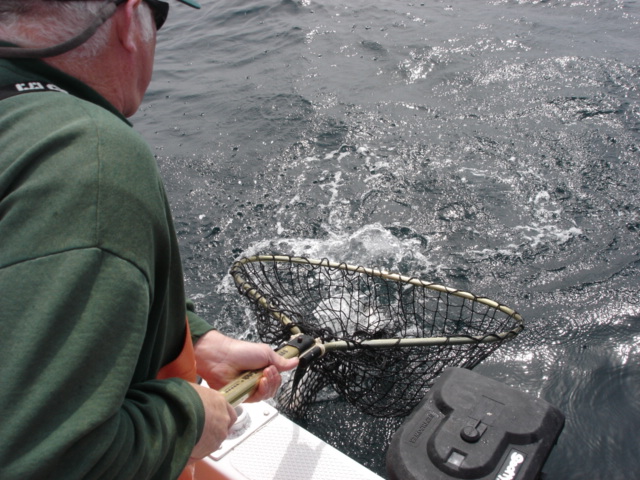
Downriggers pay off for Sitka Alaskan King Salmon |
 |
 |
DOWNRIGGERS
; The choice of downriggers could get to be a lengthy
session all by itself, as there will be many opinions as to which is
best. I have personally used Cannon manuals, Penn manuals, &
Scotty manual & electrics. Each one has different features, some
of a benefit over others. My suggestion is to go with a friend who
has other brands & get a chance to use as many as possible before you lay
out the amount of cash involved. I had never even seen a downrigger
used before I purchased my Cannons & I had a very steep learning
curve. The reason I got the Cannons was I knew a salesman who gave me a
good deal on them. After I had a chance to see how the Scotty
electrics were used by a Alaskan salmon guide, when I sold that boat, I gave the guy a
good deal on the whole package.
I would not want a manual version where the handle rotated as the line
was being let out. This can be an arm breaker. One boat I was
on that had an old Penn manual, & this was the situation. The Cannon
manual, you rotated the crank handle slightly back allowing the line to go out & by
moving it farther back, it creates a cam type brake.
This worked, but I was always afraid that a good jolt would brake something
& it required a good cleaning & oiling frequently to keep it from
seizing up if used in saltwater.
The Scotty electrics are a good design, & have been
constantly improved. If you take it to a repair center for any
problem, like even a uneven drag, most time they will update it to the newest
type of parts for no cost.. They have a 2 way switch on the upper
arm control box. This box has a slot that the wire is run
thru. It has a kind of pivoting door that is controlled by the
switch on the top. This switch has a black outer ring, & an inner
green button. To raise it, you can push this green button & as
long as you hold it down the motor will bring in the wire. However
if you want to have it come in automatically, you rotate the outer
ring. This also sets the gate to where the "buttons" you
have previously set on the wire as your stop position, a location that when they
pass thru this gate, the switch is tripped off. These buttons now
come in a package of both bright greenish/chartreuse & black
ones. It is recommended that you put one of each color on right next
to each other. This gives you a second one as a security to keep
both of them from being slid out of position & the green one is easy to see
when it is coming up. Scotty is one brand that will retrieve a 15# ball from
deeper depths.
You want to set these stops so that the ball is not pulled all
the way up. As explained below in the Downrigger Weights section, I
like to have the ball stop so that it is still just in the water. I
have a shock cord long enough that I can now grab it & pull everything in
then place the ball in a Ball Baby nest. Raising the 12 or 15# ball
out of the water is asking for a dented or crashed hull side.
When letting any of them out, do it in a smooth even
motion. If it goes too fast, the release clip & the line may
tangle around the wire. And if it goes too fast, & when you have
to stop it it may be so sudden that you fray or break the wire, or have the terminal snap off.
You will want to carry some spare parts for any make that you
have. You can always loose some bolts, blow a fuse, fray a wire, or break
a belt. I usually carry a Scotty manual unit as a backup & it
mounts in the same brackets as my electric units. Simply because it
is cheaper & a lot lighter than the electric units. And a spare can
save the day if you have planned your outing, taken the time off, & possibly
traveled some distance for your day on the water. You can then repair the bad one or replace
the wire on shore later.
Scotty electrics have a built in hand crank built into the
unit just in case the belt breaks or something happens to the connector &
you have to manually crank it up.
The spools need to be washed off after usage especially if
used in
saltwater. The best is to wash them off with one of the salt dissolving
products. One being a product called Salt Away. Wash the whole boat
& internals of the motor with this product. Then rinse off with
normal water. If you do not clean the downrigger wire, it can start
corroding. I had one brand of replacement wire that rotted in
one year. Buy a longer replacement able than they come
with. This way you can shorten the terminal end as it becomes
curled, or even if you snag bottom & have it broken off, you may still have
enough to just replace the snap & reattach another ball.
RODS
; The rods used for downrigger
fishing are usually 8' 6" & of a special design simply called
"Downrigger Rods". They need to be a stiff enough butt section, yet
have a lighter tip section so that they can be cranked down to just before the release is
tripped. In use, the rod is arched greatly. What this does is place a lot of
strain on the line & the rod, with a minimal amount of slack from the release to the
rod. When you let the line out off the downrigger & stop the ball, you probably
will then have to reel in slightly to take out all the slack in your line. I have
found that if I pull the line back in at this point with one hand & reel in
the slack with the
other, I can "feel it" better. I want the slack taken completely out &
have the release pulled up to just before it releases prematurely. If you accidentally
trip it off occasionally
you are getting it about right. When the fish hits, the rod snaps up,
automatically setting the
hook.
If you use a lighter rod you do not get this automatic hook setting action.
Longer "noodle" rods are also not considered desirable here for the same
reason. This is not to say they can not be used, but if you do, you will have to be
ever watchful & as soon as a hit is detected, reel in as fast as possible to take up
the line slack & get into the fish.
ROD ANGLE
; Set the rods at about a 45
degree angle rearward to achieve the desired effect described above. If your rod is
pointing rearward & down lower more, it CAN NOT achieve any of this automatic hook
setting
action. The rod seems to work best if mounted pointing to the rear instead of to the
side, as you will have a lot of side strain on the rod. However this will depend on where on your boat you have the downrigger
mounted, & the DR rod holder you are using.
Some west side of Vancouver Island Canadian guides seem to want to use the 10 1/2' mooching rod as
an all-around rod. This is not an ideal trolling rod by any means,
especially if it is placed 90 degrees to the side of the boat as an extension of the
downrigger arm. They then also want to run the flasher 60' + behind the
clip. What this does is, there is so much belly in the fish line &
with the
long "noodle rod", that if you get a hit, this limp rod does not set
the hook and it may not even trip the clip. Your only hope is to, as SOON
as the rod tip twitches, grab the rod & REEL VERY
FAST. If you come
in empty, well, then you missed the fish. On the other hand if when you
get all the slack reeled in & something is wriggling on the other end, you
lucked out.
REELS
; The main concern is to have a reel with a good smooth
drag. If you have a reel that is old & or not maintained that has a
drag that is erratic that will allow the line to be only stripped off in spurts,
this is an invitation to loose a GOOD fish. The smaller fish will
probably not be a problem, but a larger fish, when running, will not have the
same constant strain applied. This then may allow it to stop at the
"hard spot". Next run will be starting with more strain, &
possibly break off or pull the hooks out.
Most commonly used reels will be the star drag, level wind
reel. You may not really need a large capacity reel, since you are in a
boat & do have the ability to chase the fish if need be, but read about this
below. An Ambassedeur 5500, Penn 310 GTI, Shimano Triton 200G, or Shimano
Calcutta are some of the preferred ones. The new Shimano Tekota 600 looks to
be another winner also. It is
very seldom that more than 100 yards of line is really needed. That
said however, I like to run reels that I can spool with 250 yards of 25# monofilament line.
I have
seen big fish take out line FAST in the opposite direction that you are trolling, by the time you realize what is
happening, you do not have time to pull the other gear in & do a
chase. Remember you are bound greatly by still having your
downrigger wires in the water.
The newer reels that have line counters will also help you
return to a "Strike Zone" if conditions allow. The Shimano
Tekota line counter reels cost in the $180 range. Okuma MagdaPro
line counter series appear to the same & made for Cabellas as the
DepthMaster II series. Cabellas DM-20 or the larger DM-30 are good
reels for $40, with the Okuma slightly higher. I am not impressed with the
Shakespeare Tidewater series line counter reels as the drag is overly stiff.
If you use a reel capable of holding 250 yards of 25# or so of line, you can
use it one year, & the next year swap ends of the line on the spool
for fresh line on the normally used section (top) for the next season.
Do not make the mistake of using a steelhead rod & reel with 10# line for salmon
on a downrigger if you are in an area where you may hook into a 30# plus fish. The reason
is that when you are trolling with multiple lines in the water, and you hook
into a hog, it may take longer than you realize just to identify what may be on the other
end, as sometimes they tag along. If you are mooching, that is entirely different, as you do not have all the
other semi-permanent gear (downrigger wire) in the water & you can move quickly if you have to
while the other fishermen reel in.
LINE
;
Here is where you will get as many different ideas as there is line out
there. The normally used type is monofilament. The suggestion is to
find one brand that you are comfortable with & stay with it. You
however need a line that is abrasion resistant enough to not be effected by
repeated use of the downrigger release clip. You also need a line heavy
enough to pull the flasher & rest of the gear. Some will use 15# line
for the smaller winter Blackmouth, & go up a notch to 20# when the fish get
larger during the summer & fall. If you are ocean fishing, the old
standby is 25# monofilament. With the newer bright colored lines
becoming available, there is one aspect that you may want to
consider. That is use a bright green or yellow if you are fishing where
there is a chance of seals trying to take your fish. If Mr. seal does take
the fish, as soon as possible lighten up on the pressure so he will not have a
chance to break your line off. Then chase them & keep the boat above him. This is where the bright colored line helps, as us older codgers
can't see quite as well as we used to. The seal has to come to the surface
to get a breath & eat the fish. When he hits the surface & takes a
gulp, you can usually get the hurting or dead fish back before the seal can recover.
With the advent of spectra type braided lines like Fireline, PowerPro
etc. currently on the market, many fishermen have went to them. I will not
argue one way or the other here, except that I have found the spectra lines,
being smaller dia. do have the problem if you use the small sizes (about equal
to mono poundage) as they tend to cut into
the other line on the spool if a big fish starts pulling. This can create
essentially the same thing as a backlash in the rest of the line on the reel
& can give you the chance for the big fish to pull the hook out or break the
line. Therefore many who use the newer lines go to a larger size than
needed, just to keep the line from cutting into the spool. When the larger
dia. line is used then part of the benefits have diminished.
KNOTS ;
In any fishing the knot
is a very important factor, most all of the older style knots are not that effective on
the new spectra type lines. Therefore it is recommended you consider using the simple
little tool called "Knots for All", http://www.tie-master.com/
it is a 5" plastic tool that
facilitates & makes knots on the new line possible. This simple tool was designed by
fishing guide Joe Little. When the spectra type lines first came out he tested a 15# spectra
with the common knots & it broke
at the 15#, but using this tool & his knot, it broke at 34#.
When tying leaders, the safest way to tie the leader onto the hook is to
wrap it left handed, this places the leader around the solid part of the eye, and not
laying on the cut end of the eye that in against the shank. With GOOD
hooks it may make no difference, but many times if you get a lost fish due to a cut line
at the hook, you will find that the leader was pulled into this sharp cut off end of the
eye & you will have a small pig's tail at the cut.
At
times you will want a cut plug
to only have the front hook in the bait, with the back hook trailing, with this
you then need to tie your leaders appropriately.
SWIVELS
; The most common swivels used for saltwater fishing will be the barrel, bead
chain and ball bearing swivel. Each one has it's place. However
when
trolling, it is suggested that you get the best available.
If you want to test the efficiency of different swivels, a simple thing is to take about
12-15" of dacron line, tie both ends to the upper end of a swivel.
Then tie a mono dropper to the bottom of the swivel and then about 5 or 6"
to a 2 ounce cannonball weight. The upper looped dacron will make it
easy
to hang onto. Now quickly spin the weight. Time the difference between each
swivel before the spinning stops. You will also be amazed at the
differences in bead chain, barrel, cheap ball bearing swivels & the better
Sampo brand.
DODGERS & FLASHERS ; The big difference between dodgers
& flashers is the way they run in the water when being trolled. Dodgers are
usually rounded on the ends and slightly cupped both ends, they wobble back & forth,
or have a swaying side-to-side action. Dodgers are not generally as effective
below about 60’, because color is filtered out at that depth & they do not
make any noise as an attractor.
The flasher develops a full 360 degree rotation. As a general rule flashers
work better at a slightly faster speed that dodgers do. Flashers have to rotate,
they also create noise, -- go fast enough to achieve this action. The old
brass Abe 'n Al of 50 years ago was one of the better known flashers. The Canadian Hot Spot plastic flasher seems to be
the one most fishermen use now. The large size, the 11" Glo Green seems to be
the preferred color for Puget Sound & the ocean, while the 11" Red seems to be preferred color
by the locals in
Canada's Barkley Sound. Charge the Glo versions with a camera flash for
better visibility in deeper water.
New for 2003 is a flasher made by Pro Troll, called an
E-Chip. It has a small metal tube about 3/16" dia. & 5/8"
long glued into the rear section. This is supposed to emit a slight
electrical charge about equal to baitfish being frightened. A plug similar
to the Apex, but called the Sting King has this same chip in it. From what
experience I have had, IT WORKS.
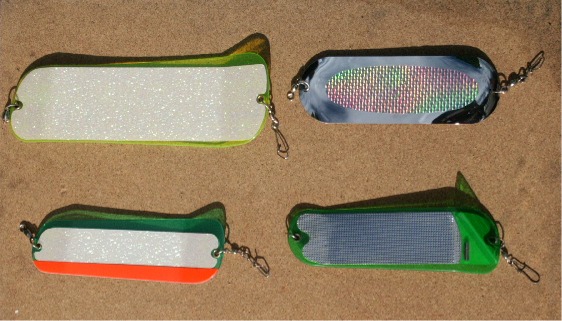
| 11"
Hot Spot Flasher
on left, 8" Coyote on bottom, with a Les Davis Dodger on top right &
Pro-Troll with chip on RH bottom |
Common
size & colors of Fish Flash, with #2 Metric spinner on one as an
extra attractor |
 |
 |
FISH FLASH
; This
rotary attractor has been around for the past 10 years or so, & is made by Big Al's Tackle Co. It is a plastic triangle with
the rear widest wings bent so the flasher rotates. They are made in 4 sizes,
Mini ( 4"), Small ( 6" ),
Medium ( 8") & Large (11"). These have proven themselves for many
types of fishing, both saltwater & freshwater. The one thing about them there is
very little drag, since they spin on their axis. They are available in many different
metallic reflective & glo-in-the-dark, the more popular colors seem to be chartreuse, chrome, red, lime green or blue
plaid, with the new purple coming in recently.
What these were first found to be very good for locally, was Chinook fishing
in estuary waters in the fall where the water had enough turbidity to restrict
visibility. When
using them, it may be advisable to add a Sampo ball bearing swivel to your mainline, in
addition to the original supplied swivels of the Flash to help eliminate tine
twisting. I have tested the large & medium units in the ocean &
can not really tell if one is any better than the other down to about 70', below
that possibly the larger may be benificial. The mini & small units have proven themselves on landlocked
Kokanee.
OK, I
KNOW THIS IS A DOWNRIGGER ARTICLE, BUT ; These
Fish Flashes can also be connected about 12" behind a diver. I have tried them attached directly to a diver, but when that close, the
disturbance of the diver effects the spin of the Fish Flash. When using
this diver set-up, I use only a 36"- 48" leader for normal salt
water fishing. One additional add
on would be to add a Metric #2 spinner directly on the rear of this to increase
it's effectiveness in that it does basically the same thing as the E-Chip. If using them by themselves as
trolling, without a diver or downrigger, you may want to also add a rudder keel between the mainline & the Flash.
The illustration below has worked well for Coho off the
stern & out about 60', it will also take Chinook. You need about
12"-16" dacron line between the Deep Six diver & the Fish
Flash to get rid of the turbulance of the diver. The mooching leader needs to
only be about 36" & place a plastic bead on the leader between the
Spi-N-Glo & the hooks as a bearing. Not scent or bait is really
needed.
Run your downriggers off the side & put this rig right off the stern in a
rodholder & wait for the action. I like the Deep Six over all other
divers in that you can adjust the trip off by the tension on the clamp. It is also a lot easier
to trip from the rod, as compared to the other divers like the Pink Lady, where they need to be
tripped by the fish. You are supposed to be able to trip the others from
the rod by throwing slack & then picking it up again, but they don't seem to
work as advertised most of the time.
| Fish
Flash behind Deep Six with Spi-N-Glo for Coho |
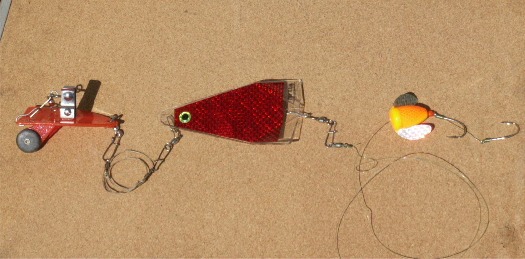 |
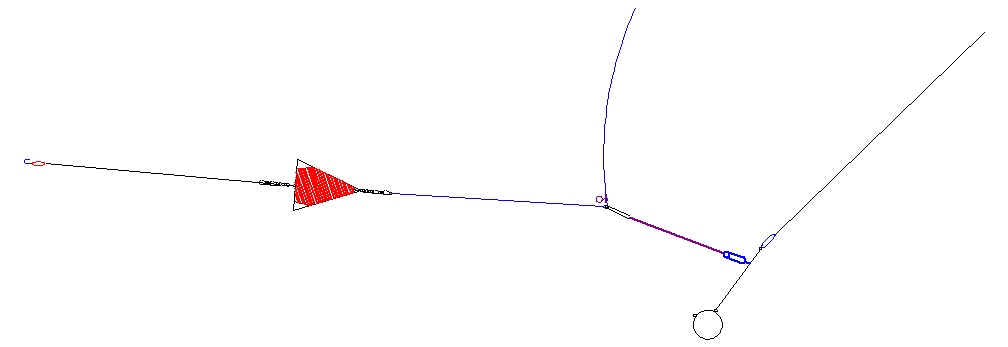
In both of the illustrations below, you will see a 1 to 4 oz round
lead sinker attached to a slider on the mainline resting just above the line
release clip. This is an option that may gain you a fish occasionally as
explained in the section below "No Attractors for Coho". A flasher or
dodger could also be substituted for this Fish Flash.
| A Fish Flash attached to a downrigger unit.
Note the lengths may not be to scale |
  |
ACE
IN THE HOLE ; This method
shown below, of
trolling is using a flasher attached to the downrigger ball instead of on the
mainline. The appealing thing here is that you do not use the flasher or
any weight on your line or leader, just your bait or lure. Have the
flasher back about 30" behind the ball & attached directly to it.
No lure behind it, as it is simply an attractor for the lure close above.
Now attach your release clip on the mainline far enough up so that the flasher
can not raise up while descending & tangle with the leader. You want
the lure to be just above & behind the flasher.
With the above set up you
can run a lighter rod & with the lighter rod, you can tell quickly if you
have a small shaker fish hooked. This is a proven method for
Blackmouth. You can use no weight or a light one as a
slider just above the release as described in the following paragraph.
| This is called the Ace In The Hole setup, again
possibly not
to scale |
 |
NO ATTRACTORS FOR COHO
; If
you are trolling in an area that you are reasonably sure there are Coho, a
simple method may help get multiple hook-ups. When you have located a
school of Coho, or even Chinook, abandon your flasher, etc. Simply use a 4 oz. slider sinker and
a mooching leader. Instead of stacking running more rods than you really want on the
downrigger, run say one each on your downrigger & simply troll the others.
For the ones on your downrigger, snap your release on the mainline below the
sinker & the bait as far as you prefer. Now when you get a hit, raise
or lower the downrigger wire to the depth of the hit, pop off the
release on the other rod,
pull the wires up, & kick your motor into neutral & you are very quickly
mooching, hopefully in the school of fish. You may want to either raise or
lower your other lines to put them into the "Fish Zone". Many times this is more
effective than trolling thru the school.
Also, at this time, if the frenzy is on, do not get real excited in
bringing in all the fish to the net before you rebait & get the bait back in
the water, as the thrashing fish seem to attract others to the area.
Another method somewhat akin to the above, is
to run the 6' mooching leader behind a rudder. Snap the main line into
your downrigger release with 80-90' of line behind the release.
You should be able to see the downrigger ball on the screen, now
by watching the sonar fishfinder constantly, & then when you see a fish arch above or below the ball,
immediately raise or lower the ball to
match the fish's depth. Your bait will have enough time to move to the
depth you have now set the ball by the time you have trolled to where you saw the
fish. Sometimes this method of targeting a single fish will pay off
better than "Flock Shooting" the whole ocean in hopes of stumbling
onto a fish at the right location & depth.
SNUBBERS
; Since the requirement of barbless
hooks, it has been apparent that many fish are hooked, but come off before being brought
to the boat. Les Davis has now come out with a 10" rubber snubber
that is attached in the system, either between the mainline end and the flasher
or behind the flasher. This will help maintain a more constant tension
on the fish, and possibly help prevent the hook from pulling out.
My thoughts here is that it does 2 things. IF you are
using the new "Spectra" type braided lines & a stiff or fast rod,
yes you WILL need a snubber to make up for the solid connection to the
fish. However if you are still using monofilament line, the line has
enough stretch in it to do the same as a snubber.
There is a couple of alternatives that will improve
your catching ratio. You can use the braided line, but keep
the drag set to just where it does not pull off the reel when trolling, put the
clicker. When you get the pop off, let your loose drag peel line when you hook up.
Do this until the fish is well behind the boat. Make sure the drag is loose.
Reel down on the fish to the point where the bend of the rod starts showing a definite hooked fish on
it, but resist the temptation to set the hook. The speed of the troll, the bend of the rod, the setting of the
drag, the sharp hooks, and the snubber should be enough to do the job.
MATCH THE HATCH
; If using a squid or
spoon, try to use a size & color of the baitfish in the area on that particular
day. As soon as you catch a fish, cut it open & examine the stomach
contents. This will give you a clue as to what bait is in the area.
As Tom Nelson form Salmon University says about artificial bait,
"any
color as long as it is green". And if you fish below about 30', it
is best to use a GLO version of spoon or squid. Tom also suggests a blue/green/cream
glo squid with a small green Spi-N-Glo on the line in front of it 20"- 32" behind
a Hot Spot flasher. This system has also proven itself behind a diver.
SCENT
; Use scent on all artificial
baits, herring. anchovy, scrimp, seem to be the best. Put Power Bait & /or scent
into a squid body.
When using scent, try not to get it on the mainline at the location of the downrigger
release, this makes for more premature tripped releases. One other approach is when using a snubber, punch a couple small
holes in the rear, & inject the hollow tubing with scent, this then acts as a
reservoir & slowly releases the scent over a longer period of time.
While on the subject of scent, many people excrete a enzyme that fish
find repugnant. There is quite a bit of evidence that L-lysine from human
hands repels fish. People have different levels of this amino acid in
their bodies, which is excreted onto their hands, and it is easily transferred
to lures and bait. To be on the safe side, before you start to fish, wash your
hands with a fishing type soap, or dishwashing soap (Lemon Joy), dry them, & then place a small amount of herring oil
on them, rubbing it into your skin. Pat your hands dry with a towel, without wiping
it off. This will help set things up for a possible catching experience, as there is
a difference between Fishing
& Catching.
While on this & relating back to SMELL
There
is a new item on the market & brought out by Salmon
University that is called the "Salmon
Scenter". This was a specially designed PVC tube with slots in the
sides that is filled with their scent nuggets & then attached to the
downrigger ball. In essence, it milks out a scent trail & with your flasher/bait
in this trail, it increases the percentage of strikes. The scent nuggets
are the same fish food that the hatcheries feed the small fish before releasing
them. This appears to work best for hatchery Coho, as it gives them
something familiar to home in on, & targets the fin clipped hatchery fish as
opposed to "Wild Coho" that usually have to be released.
This original
design has now become obsolete & has been replaced by a nylon mesh bag
pre-filled with the nuggets & sold by Silver Horde.
RELEASE
CLIPS; When using downriggers you
will have to use some sort of line releases. There are about as many different types
of these as you can imagine, you will have to pick one with the proper tension for the
fish being targeted, as a light one for trout will not hold the salmon flasher. The
most common use spring tensioned pads to hold the line, for a lighter trip off you set the
line farther out in the gripping pad area. When going thru weeds, the weeds sometimes foul the release,
not allowing it to trip. It is recommended that if you find weeds in the area to
pull the gear more often to clean it. The new Scotty release is designed to
divert weeds off of it better than most.
When using the new spectra lines, some spring padded type releases do not really hold
the line well, or cause abrasion & can break the line off. The best release
found for these are the Pro Release, which uses a pivoting arm that snaps into adjustable
rubber notches. The one thing to remember here is that be careful when winding the
line on the arm so that it does not overlap, & thereby not releasing when tripped.
This one does have one disadvantage, in that since the line is wound around the
pin with the trailing part farther out on this piveted pin, that if you try to
manually trip it, sometimes it is hard to trip.
| Release
clips, Offshore top left, Pro Release bottom left, new Scotty top right,
with older Scotty below & old Scotty plunger type bottom middle |
 |
On all releases it has been found best to use one that has a heavy mono
attached to the large snap that has enough length so that you can snap it onto the wire
& without having to lean out over the boat's gunnel to attach the release to the
fishing line. This will also allow you to attach it on the line more precisely each
time. The most common length seems to be about 48".
The one possible
drawback for using a heavier release setting is that possibly a undersize fish will not trip the release as reliably.
You will have to balance the release setting to the actual amount of drag
encountered by your gear. It seems best to use a setting that when you
wind down the rod's line, to create the rod arch after achieving your depth,
that occasionally you will have it trip off without a fish. This will be
apparent within seconds after getting it set.
Another thing to remember is that if you
are stacking 2 lines on one wire, that they both will have to be set to a
slightly higher trip tension, so that you don't have to be constantly bringing
the wire up & reattaching the release if one trips off prematurely.
HOW
LONG A RELEASE? ; This
pertains to the length of the heavy (100#) mono that attaches the release to the
wire clip. The longer the downrigger boom, the longer the release line has
to be. It has to be at least as long as your boom, otherwise you
will be leaning dangerously over the gunnel to attach the line to the
clip. I usually use a 48" length. One thing you can do if it
pops off & you have pulled the wire in, but the release is trailing in the
water too far out to grab, is to reach out with your rod tip & pick it up,
then bring it in to where you can get ahold of it from there.
HOW FAR BACK?
; This is sometimes
called DROP BACK, & is in reference to how far back do you let the flasher go before
snapping the release onto the line. It will depend on the water clarity, the fish
targeted, the visibility of your line, etc, etc,. Some fishermen run the gear back
40', while others go back 10'. Remember however, that the farther back you go, the
less setting power the rod has when the release is tripped. I seem to have
settled on about 15' for most saltwater salmon fishing, but am experimenting
with closer. Some of these lengths are
what is required to allow the attractor to operate properly. Also if you are relying
on a "Black Box", your electrical charge on the wire decreases as you go farther
back. Here are Tom Nelson's recommended lengths.
Large Metal Flashers ---- 6 to 10'
Large Plastic Flashers ---- 8 to 15'
Small Metal Flashers ---- 8 to 12'
Small Plastic Flashers ---- 10 to 20'
DOWNRIGGER WEIGHTS
; Most
weights, (balls) used for salmon fishing will be from 10 to 15#, with 12# being the most
common. If you use the heavier weight you can get deeper with less blow back, &
have less chance of line tangle between the rigging on both sides. Also the plus
here is it helps keep the wire more straight in the water & lessening the chance of a
tangle around the prop. Some electric units however are not strong enough to pull
a 15# ball.
Some weights have a metal fin off the rear
that can be bent to allow the ball to track in one direction more than just straight
back. This can be helpful if you bend them so they tend to
direct the wires more outward.
Ideally the ball should be painted or plastic covered to
help with the conducting of electricity in a polarity problem. If the ball is
not coated, then the next best thing is to use a ball connector of some type on the end of the wire
that is made of a non-conductive material, (nylon, plastic, leather etc.). In
use you need something to attach between the ball & the terminal end of the
wire. Scotty & Silver Horde make these about 12" long & out
of a plastic that will stretch. They say it acts as a shock cord
also. You can make your own out of 150# Tuna cord for a lot less. This will
beak the conductivity to the wire, & at the same time give you something to
hang onto when you may want to pull the ball into the boat without trying to
hang onto the wire itself.
BLOW BACK
; Your trolling speed & current will make a
difference here, usually you want your downrigger line angle to be about 45 degrees no matter what
actual speed you are traveling. This equates to 143' of line out to reach 100' of
water depth. If you are out farther than this angle, you can not reach the
depth you intend to. The problem comes in if you are trying to reach say 200', the
wire angle would equal 286', but your line
drag may increase this length even more. You will have a belly in your fish line from where it
enters the water to your release clip so much that the rod action will not set the hook
like it is supposed to do if fishing shallower. And if the line is straight up
& down, you are not moving at all. Most downrigger wire is only 250'
long.
TROLL WITH THE CURRENT
; The fish will
be swimming into the current, if you troll with the current, the fish will see it coming,
instead of it sneaking up behind them, & you will also cover more water.
Also it allows the fish less time to scrutinize your lure, possibly bringing on
a strike, where if the fish has more time it may realize the lure is just that
& not something to be eaten. Depending on the flow, you may only be sitting in the same position with water passing under you.
TROLLING SPEED
; The most
important thing is to have your flasher & bait working properly, as they
were designed to do. The old story is troll slow for Chinook & fast for
Coho. That may have been so with the lures & gear of that day, but now
things are slightly changed. Take a look at the commercial salmon troller, many
times he will be doing 6 mph. The knowledgeable fishermen currently say most
fishermen now troll too slow. What ever bait you are pulling, or
flasher/dodger, you will have to look at it in the water & decide how it is
functioning, then adjust your speed from there.
PULLING IN YOUR LINE
; If
you have to pull your line in to change gear or a missed hit & it did not
pop off, don't try to trip
it off the clip with the rod. Raise it by bringing up the downrigger
wire. The reason is threefold. First, this is probably the most
likely way to break a rod. Second, some clips do not trip as easily from
the rod side as compared to from the lure side. And third, if the lure is
even somewhat working, it may catch a fish on the upward trip.
WATER TEMPERATURE
; Fish
will try to stay in a water temperature that they find comfortable to
them. This may explain why some fish stay nearer the bottom than others,
because the water will be warmer on the upper layers.
This may be way more important on the estuary Chinook salmon
fishing like Buoy 10. Usually at the time the season opens here there has
been no rains for a couple of months & the river's water temperature may be
72 degrees. With the water this warm as compared to 56-58 degree of the
ocean water the fish have just come from, the fish will move in & out with
the tide. The estuary's water temperature will be between 56 & 65 degrees
depending on the tide, because of the mix of ocean water to the warmer river
water. However the bulk of the fish seem to not stay in the lower river. The
ones that do, will try to locate a hole that will have cooler water.
You may have heard that the fish lay off the mouths of the rivers
waiting for fresh water of a rain, yes, this may be true, but I think it also
could be that the new rainwater is also cooler.
If there is no rain, then when the fish have matured to the point
that they have to go upriver, they do not stay in any one location for any
period of time, just let me go back home.
One thing you may consider is to get a fish thermometer and
occasionally attach it to your trolling cannonball. This will read
temperature at where you are fishing. Otherwise the temperature taken off
your depth-finder sensor will only read the water surface temperature.
SEAWEED ; Seaweed can get
enough on the line to foul the swivels & therefore create twisted
gear. If troubled with seaweed
or grass on your line, adding a golf tee on the mainline as your uppermost gear, will help
divert most weeds off. The tapered small portion of this golf tee seems to
allow the weeds to be passed off, where a knot at a swivel seems to stop &
hold the weeds.
JELLYFISH
; At times these critters can make
life miserable. If they are on your gear, it is very likely salmon will
not be interested. Also when you pull the gear in & remove these
jellyfish, they have a composition in their bodies that feels like nettle
stings. One word of caution, WAS YOUR HANDS before you go to the toilet
facilities. One fisherman shared his method of removing this jelly off his
hands, by use rubbing alcohol.
LEADERS & HOOK SIZE
;
Terminal leaders, 20#, 2/0 - 3/0 solids for cut plugging for early Blackmouth, Feb- July
Terminal leaders, 20#, 3/0 - 4/0 solids for cut plugging for later Blackmouth &
Chinook
Terminal leaders, 20#, 3/0 - 4/0 slips when using frozen bait in bonnet
Terminal leaders, 25# / 40#, 4/0 - 5/0 solids, tied close, for large bait in Estuary use
(large Chinook)
Terminal leaders, 40# / 70#, 5/0 - 5/0 or even 6/0 -6/0 solids, tied close for use with
squid behind flashers
Tie terminal leaders 2 lengths,
(1) 36", rolled onto pipe insulation for faster attaching (you will use more of this
size & it saves leader)
(2) 72 "
"
"
"
"
"
"
(you usually will find these as the
std. commercially tied)
Primary leader 36" with black swivels, for behind sinker or attracter, make up the
desired OAL with terminal leader
LEADER LENGTHS FOR REGULAR TROLLING,
(Estuary rig) bait 36" - 72"
"
" "
MOOCHING
(Most Saltwater) bait 72"
While we are on this subject, it has been found that it may be best to NOT tie your leaders on limp monofilament. The reason seems to be that with
the spinning action of the bait, even if you use swivels between the sinker or
attracter, that the limp leader just doesn't have the ability to resist the
twisting action of the bait up the line to where the swivel can do it's job.
USE HEAVIER LEADERS FOR SQUID BEHIND FLASHERS
; USE 40-70# TEST LEADER FOR TYING SQUIDS, HOOCHIES &
FLIES. These lures, having NO built in action like a spoon
& need the motion of the
flasher to impart an action to the bait. This heavier leader being
stiffer, imparts the action of the flasher to the lure. Whereas a lighter
limper leader will bend more, minimizing the action & allowing the bait to follow the flow,
& be less enticing to the fish.
Some will advocate the use of the newer almost
invisible Florocarbon line & leaders, it has been a practice of some to use
this type of leader material for all leaders behind flashers. This larger
material being harder to see in the water also has the benefit of being less susceptible
to abrasion & being nicked by the fish's teeth, which in turn lasts longer between
leader changes. This material is not cheap however, and is rather hard to
find. If you find it, only purchase "Leader" material, as the
abrasion factor is different than for the line. Using this leader may be beneficial
if you are fishing in clear water & in the top 50' of the water column, but it is my contention that
if you constantly troll below that depth, you are simply paying more for your
leaders as compared to standard monofilament.
USE DIFFERENT LEADER LENGTHS FOR DIFFERENT BAIT &
TARGETED FISH ; The following dimensions regulate the rate of spin on the
bait, - short = faster, longer = slower. For those of
you who insist on 2 different speeds for trolling for both Chinook & Coho, you can do
it from the same boat at one constant speed, by regulating the leader lengths.
It is not solely the boat speed, but the action the bait has that entices the fish to hit,
and this can be controlled mostly by leader lengths behind the flasher.
Measure distances from the rear of the flasher to the rear of the
lure
Best to use the most invisible 20# leader possible when using bait
| Large Hot Spot Flashers
(11") |
Squid |
Chinook (Adult) |
40"- 46" |
Med. troll |
2.5 - 3 mph |
| . |
. |
Coho |
30" - 36" |
fast troll |
3.5 - 5 mph |
| . |
. |
Blackmouth |
30" - 36" |
. |
. |
| Mini-B2 |
. |
30" |
. |
. |
. |
| Grand Slam BT |
. |
28" - 31" |
. |
. |
. |
| Bait |
All |
47" - 55" |
. |
. |
. |
| . |
APEX 3" |
Chinook / Coho |
49" |
. |
. |
| . |
APEX 4.5" |
Chinook / Coho |
72" |
. |
. |
| Mini Hot Spot Flashers
(8") |
Squid |
Chinook (Adult) |
26" - 31" |
. |
. |
| . |
. |
Coho |
20" - 24" |
. |
. |
| . |
. |
Blackmouth |
20" - 24" |
. |
. |
| . |
. |
Sockeye |
18" - 22" |
slow troll |
. |
|
(White) |
"
pink |
Pinks |
16" |
slow troll |
1.5 mph |
| . |
Bait |
All |
32" - 36" |
. |
. |
| . |
. |
. |
|
. |
. |
| Large Metal Flashers |
Squid |
Chinook (Adult) |
30" - 37" |
. |
. |
| . |
. |
Coho |
27" - 31" |
. |
. |
| . |
. |
Blackmouth |
27" - 31" |
. |
. |
| . |
Bait |
All |
44" - 50" |
. |
. |
| . |
. |
. |
. |
. |
. |
| Small Metal Flashers |
Squid |
Chinook (Adult) |
20" - 27" |
. |
. |
| . |
. |
Coho |
17" - 23" |
. |
. |
| . |
. |
Blackmouth |
17" - 23" |
. |
. |
| . |
Bait |
All |
30" - 34" |
. |
. |
| size 0/0 |
bare red 2/0 hooks |
Sockeye |
9" |
dead slow |
70 Degree Line Angle |
| . |
pink mini squid |
Sockeye |
12" |
dead slow |
" "
" |
| Fish Flash (large/med.) |
Bait |
Coho |
22" - 24" |
(use Sappo swivels) |
|
medium |
large orange spin-glo |
Coho |
24" - 36" |
(use Sappo swivels) |
|
large |
Bait |
Chinook |
18" |
in tidewater |
. |
| Divers / Mini Hot Spot |
Squid |
Chinook |
32" |
. |
. |
| . |
. |
Coho |
24" |
. |
. |
| . |
Bait |
Chinook / Coho |
36" |
. |
. |
LURES ;
On
most artificial lures, there is one thing you can do to up your boating
percentage. Many will come with a triple hook attached. Remove
this hook & install a #5 stainless split ring & a #4 barrel swivel between
the lure & a new hook. Replace it with a single Siwash hook that you put
a slight sideways bend in the lower part or just move the point off center by
1/8". This side angle seems to help on more hookups. By adding
the swivel you are
also eliminating the situation of when
fighting the fish, the fish will more than likely roll numerous times
putting strain on the lure & hook. In doing so this fish uses the
leverage of the solidly attached hook to the lure to pull the hook out.
On others metal lures like the thin Silver Horde "Coho
Killer", if after catching a fish, you might want to check the lure's
action before you let the gear down again. These lures are thin &
narrow to imitate candlefish. They are an excellent lure for intended
purposes, however they can get straightened out. On the same light, if a
new one is not performing, you can put more of a bend in it to achieve more
action.
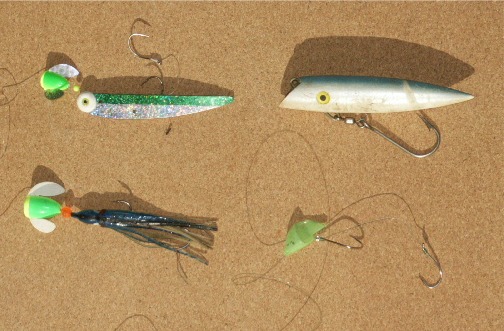
| A
combination of Apex, Sting King, Coyote, Canadian Wonder & the Bait
Buster with a spinner blade attached |
Bait
Buster top left, hoochie or squid bottom with #4 Spi-N-Glo on line, - plug top right, herring bonnet lower
right |
 |
 |
APEX / STING KING (order of preference)
#1=Chrome, #2= Mother of
Pearl, #3= Green/White, #4=Black/White by itself or with
a flasher.
PLUGS (old style commercial) preferred color - some form of
white. No flasher, 35' to 75’ behind Down Rigger
release clip.
Mini-B2 & squid -- use 40-70# leader 5/0 or 6/0 hooks tied so front
rear bend is even with rear eye with hooks Pointing opposite, use plastic straws on leader above hooks, as spacer in squid. Adjust this spacer so that
both hooks hang behind the rear of the squid. Salmon seem to be "short strikers" & this gets more hook-ups. You
may want to cram front body of squid with power bait or scent. When using the Glo versions, charge them with a camera flash.
Squid or Hoochies -- here it has proven advantageous if you, when running a squid
behind a flasher/ dodger, (not a Fish Flash) to add approximately a #4 green or
blue Spin-N-Glo on the leader ahead of the plastic squid, using a plastic bead
between the tow as a bearing. This will add to the attractiveness of
the lure.
2 LURES ON ONE LINE ; If you look on Scotty's webpage, www.scottyusa.com they show how to run 2 lures off one
rod line using a downrigger. Basically you attach the lure like you normally do, but
then let it down about another 15 ft or so, attach another release clip, (this one should
be short from the wire to the release). Pull slack so there will be a belly in your
line when in motion, snap another lure onto your rod's line between these release.
This 2nd lure (preferably a spoon, etc. and on a shorter leader to help avoid
tangles) will find it's way to the center of the belly & ride there. You will
now have to be alert, and when pulling the ball, to not put a electric
downrigger on automatic &
forget to stop it short & remove the top release. You will also have to use
extra care when netting a fish caught on the top lure.
This principle can also be used in mooching or diver trolling fishing, if you
make the 2nd leader short (20") and attach it to a swivel placed in the line about
40" above the lines terminal end.
THE HOOK
; Buy the best hooks you can afford. It makes
little sense to pay a small fortune for a boat and then scrimp a few bucks on the
one thing
that is the most important of all.
Rule #2. Sharp Hooks. This seems
like an obvious thing but most fishermen ignore it. Very few salmon hooks are sharp
enough even brand new. The Scotty Pro team worked eight years filming salmon hitting
baits and lures in the ocean. They learned that the salmon come after your bait time and
time again. The average salmon misses or just grazes the bait at least two times
before he hits solid enough to get hooked. They observed one salmon hitting a bait twenty
two times before he got hooked on the twenty third try. If your hooks are sticky
sharp you have a much better chance of that hook digging in as a salmon hits and slashes
at the bait.
You will find fishermen swear by as many different brands of hooks as is out there on the
market. They will all catch fish, some seem to be better than others. The
important thing is to keep them SHARP . I test the hooks tip by
scratching my thumbnail, if it digs in it is sharp, if it slides across, sharpen
it. During fishing season, my thumbnails look
pretty chewed up. Carry a hook file or emery stone and sharpen those hooks on every
trip. Recheck them occasionally. You will definitely be rewarded with more
salmon in the fish box.
Take your pliers and bend the hook out and away some from the shank so as to offset it a little more.
Next SHARPEN your hooks from the inside edge so as to direct the point slightly out and not in as the come from the package.
MATCH THE HOOK TO THE BAIT SIZE
;
When using bait, you should generally match your hook size to the herring size for best
results.
| HERRING SIZE |
PACKAGE LABEL COLOR |
APPROXIMATE HOOK SIZE
|
| 3-4" |
Orange label |
1/0 - 2/0 |
| 4-5" |
Red label |
2/0 - 3/0 |
| 5-6" |
Green label |
3/0 - 4/0 |
| 7-8" |
Blue label |
4/0 - 5/0 |
| 8-9" |
Purple label |
5/0 - 6/0 |
| 9-14" |
Black label (horse herring) |
5/0 - 6/0 |
CUTTING & HOOKING BAIT
; When cut-plugging a herring, you should wet your hands, cutting board,
herring etc. This will promote the non removal of scales off the
bait. The more scales you leave intact on the bait the better the bait
will perform for you. In cutting the bait, if you do not use a
cutting guide, use the 45/45 degree rule. Then remove the entrals. One
modification is to also cut a 90 degree Vee notch at the rear of the body
cavity. This generates longer bait life by not tearing the cut angle &
allows the water to flow out this hole, creating bubbles. A modified West Port hook up is good. This is hooking the upper hook thru
the belly cavity & up thru the backbone & out in the center of the
back. The other hook is passed thru the belly cavity & out the short
side belly, then just allowed to dangle back by the tail.
When using whole herring for bait, about the best way I have
found is to run the rear hook thru the lips of the herring sideways. Hold
the herring by slightly squeezing it on top of the head & bottom of the
jaw. Right behind the forward part of the lip juncture between the top
& bottom you will find a spot that the upper hook will go straight thru from
one side & out the other, push it thru. With the lower hook on
the same side that the upper hook's eye is on, push it into the rear section of
the herring, (usually about 3/4 of the way back). Bring this lower hook
mostly thru the bait & back out so that the hook's point is facing forward
with the eye laying alongside the bait. Now rotate the front hook 180
degrees without tearing the bait, & push it in thru the rear gill plates
& out the other side so both hooks points are on the same side. There
should be a slight bend because of the tension from the front hook. If the
bend goes not give the desired spin, move the rear hook either forward or
rearward or tie your leader spacing differently to match the bait
size. The above method holds the mouth closed.
Another method is to use one of the "herring
bonnets" when you troll whole herring. There are many different
types, but essentially they allow you to put the nose of the bait in a protected
bonnet. This will help especially if the frozen bait is not as good
as you may like, & it helps keep the bait from pulling apart, & gives a
rotating turn to the bait, without the effort of placing the hooks EXCACTLY in
the right location for each bait.
TO TOUGHEN YOUR BAIT
; To toughen herring or anchovy bait, soak in 1 cup rock salt to 1 quart water, to form a
salt brine, bait should be soaked in this overnight, however even a few hours helps.
It can be kept in a refrigerator for a a month or so, if for longer freeze it
in the brine. The brine being a strong salt solution will not
freeze. You however may want to make a wooden floater lid on your
container to keep the bait submerged.
Formula #1 put blue & or green food coloring in brine to replace dead fish
color.
Formula #2 add powdered milk into the brine. This
powdered milk being lactic acid, kind of acts like a tanic acid & sets the
scales.
Formula #3 combine 1 & 2
SINKER DROPPER LENGTH, REGULAR TROLLING
Estuary
(Shallow water) (15’) 12"
"
"
"
"
"
(Deeper water)
(35’+) 24"
This rig consists of a sturgeon sinker slider unit on the mainline. Attach a lighter
dropper to the slider for the cannon ball sinker.
Attach a Fish Flash to the mainline, with the bait tied to the Flash. Use a large Fish
Flash as the water is usually not clear.
Here is surely a time to slide a golf tee on the mainlines uppermost section above
the sinker slider to keep off the weeds.
SINKERS for MOOCHING
; Since the
barbless hook requirement, the old tied in line kidney sinker should be abandoned, because
it can be used as leverage for the salmon to throw the hook. It is suggested that it
be replaced be the Metzler slider bar type sinker, or the simple sturgeon sinker slider on
the mainline and then attach the round cannon ball sinker to this slider snap. The
round ball is cheaper & has less resistance so therefore a lighter sinker will get you
down just as deep. Another good thing to do when using the slider, is that the cheap snaps
usually used on these
sliders will bend if you get the sinker hung up. Or you can use a lighter
short 6" leader as a dropper, thereby breaking the dropper and
saving your other gear.
WASHINGTON 2 OUNCE LIMIT
; To fish deeper if in a Washington State 2 oz weight restriction
areas, if
you are using standard gear, switch to a 20# spectra type line. This is usually equal in
diameter to 6# mono for size & will create less drag. The word is that using this
gear, watching the tide change & back-troll. Buy using this method, 150' depths can be achieved with a 2 oz
weight. Or use the super-line and a diver that weighs less than the 2 oz. Doel Fins &
Luhr Jensen Jet Divers are 2 that do comply, and can get down to about 50 ft. Rig
the Jet Divers on an 18" dropper off the end of the mainline 3 way swivel. Then off
the 3-way swivel go with 40" to 50" of leader to a small Hot Spot Flasher or
Fish Flash, then 20" to 24" leader to a squid or herring for Coho, or 26"
to 31" for Chinook.
POLARITY
;
Commercial trollers
have for years known that some boats will out-fish others, this can sometimes be traced to
electrical current in the downrigger wire. If you remember your chemistry from high
school, when you place 2 dissimilar objects (stainless wire & zinc anode or a aluminum
boat) in a conductive solution (salt water) you create an electrical charge. Scotty
& Pro Troll both make a "Black Box" that can be adjusted to give the desired electrical charge
to your wire. Different types of fish react to different electrical charges.
If you have any doubts, you can simply check your wire with a volt/amp meter. It
should have a voltage of + .5 to +.7 from your ground to the downrigger wire.
If it is outside this range either way, it will benefit you to consider doing something to
correct the problem. If the voltage is low, you can add zincs to your
motor/trim tabs, etc. If it is high, then it is suggested you check things
out & ground everything metal that is in the water. One thing most overlooked would be your trim tabs. They will usually be bolted thru
the fiberglas hull, just run a bare #10 wire as a ground from you negative battery
terminal to the bolts & put a second nut holding this ground
wire. Do this to anything metal that is on the outside of the
hull.
PROTECTING YOUR GEAR
; The saltwater environment is something that will ruin more gear than anything
else. Many fishermen don't properly take care of the rods, reels,
flashers, or spoons. The result is when they want to use them next year,
many are ruined or badly in need of TLC. One method commonly used by knowledgeable
persons is to, as soon as you get off the water, or at least before you leave
the boat for the night, spray the gear with "Salt Away". This
solution will remove the salt. Next you want to lightly wash the same gear
with plain water. Let it dry, and then spray it with a corrosion
blocker. Two that are effective & economical are made by CRC.
They come in aerosol cans & are CRC "3-36" & CRC "Engine Stor".
Another would be LPS-1. This stuff is a
light spray metal protector & will help immensely on rod guides, reels, swivels
& spoons.
WHAT
TO DO AFTER YOU HOOK A FISH
; In use you can set the drag slightly lighter than normal, but to where it
does not pull off while the boat is moving. Set the clicker to
"ON", this will wake you up when a fish hits, & with the drag set
slightly lighter, if the fish happens to be large enough to pull the line until
you get things organized.
OK, now your rod
has "Went Off", meaning a fish probably has hit the lure & the
line has snapped out of the line release. What do I do? Grab the rod
& REEL FAST to take any slack in the line & see if you can feel the fish
on the other end of the line. If it is still hooked & you can
feel it, reel in & keep the line tight.
Once you make a decision as to the size of the
fish, do we leave your partners rod in the water or not. If
the fish is under about15#, you may leave the other rod out hoping to pick up
another out of a possible school of fish. Do not stop the motor, but keep
trolling & you may want to turn the boat SLIGHTLY toward the fish to give more room to net
the fish, while at the same time considering keeping the other lines from
tangling in the prop. You may slow down slightly, but do not stop. For one,
if you do stop, then your partner's line may become entangled with his
downrigger wire.
As soon as the fish hits, pull that downrigger wire & ball in.
Here is where the electric downrigger comes in handy. If you are using a
electric model that has an automatic button & a preset shut-off trip, all
the better. Pull the ball into
the boat. You may also want to rotate the downrigger arm straight back or
forward to give
more room off the side to net the fish, without entangling things.
If the fish is a larger fish & pulling out line that you have no
control over, then you
had better quickly pull the other downrigger up, stow the balls & be ready to fight
the fish, or even chase it to recover some line back onto the reel spool.
It is best if the
netter & the fisher to also wear Polaroid glasses, this will allow
them to see into the water & see the fish a lot better cutting out the
surface glare.
Another thing to keep in mind, is at all costs try to keep the fish out of the
other downrigger wire. If it happens to tangle your partners line,
then have him put his reel in free-spool, only reeling in when lots of his line
is out, but not interfering with the fighting of the fish.
Most experienced recreational trollers do not stop the boat when an
average size fish hits, as
there is usually other gear out. By the time you realize it is a fish large
enough that you may have to pull the other gear & chase it, this fish may
already have 150 yards of line out & going away from you. You need a
reel that has enough line capacity to act as a cushion to allow you to get the
other gear in, turn around & chase the fish to retrieve some of this lost
line.
Some fish, depending on where they are hooked will ant to go to the right, or
the left. Take him on the side he wants to go to, do not to to bring a RH
hooked fish on the LH side of the boat. If a fish is hooked with a
lure on one side of the mouth & you keep putting him on the other side just
because that is where you are comfortable in netting from, you very well may
pull the hook out before he comes in. This then will also determine
what you will do with the other rod & downrigger wire.
This has also proven beneficial if you happen to have 2 fish on at once, as with the
boat still moving, the second fish tends to not get as excited if you do not get it
really close (around 30') to the boat & it will tag a long, giving you time to net the
other smaller or more tired fish first.
NETTING
THE FISH ; Wear poloroid sunglasses to help
cut the water surface glare & allow you to see the fish in the water
better. More fish are lost within 10' of a
boat than any other location by fishermen who try to net too soon.
OK, the fish is coming in, ( we are now assuming that you are not alone
here.)
If possible let the fish tire out to the point that
it comes in along side of the boat, without spooking & wanting to make
another run. Some skippers like to have the fisherperson move forward enough from the stern to
allow the netter to stand in one of the rear corners. This gives the
netter a chance to cover more area if the fish tends to go behind & or under
the motors.
The netter needs to grab ahold of the BOTTOM of the net bag lightly with a
couple of fingers of the forward hand that is also holding the net handle close behind the
bow to give maximum diversity. This method is so that you are holding the bag out of the water
& not spooking the fish. With the other hand the netter has ahold of the
handle as far back as possible & yet be able to control the net in any
circumstance.
| Notice
the left 2nd finger of the forward hand
holding the net bag. Also notice the Polaroid sunglasses |
Nice job on a 26# Chinook salmon |
 |
 |
Be sure that the reel drag has NOT been tightened down more than
normal during the fight, as if the
fish makes another run with a tight drag, it may pull the hooks out or break the
line or
rod. If it is a large fish you may even lighten the drag slightly to
assure this will not happen. Allow the drag do what it is designed to do. This
will actually get more fish into the boat. When the fish comes along side & appears to not offer a lot of
resistance, the fisherperson needs to lead the fish toward the netter, but not
bring it's head out of the water, (for some reason the fish finds extra energy
if it's head is out of the water.) As the fish is lead in, the
netter makes a QUICK jab down IMMEDIATELY IN FRONT of the fish, at the same time
releasing the fingers that
are holding the bag's bottom at the same time the net hits the water & since
fish has not reverse, the net can then
be QUICKLY lifted straight up, closing the bag & trapping the fish in the
net & then against the side of the boat. Do NOT raise the net
parallel with the water, but pick the handle straight UP, again closing the
bag.
Also here is one thing to remember, that IF the lure has more than 1 hook,
when you net the fish, you have to do it right the first time, as if you do a
close miss
but are near enough to tangle a loose hook in the net, you can kiss the fish
goodbye because the fish is now probably outside the bag & yet attached to it.
Sometimes this process has to be speeded up if you can see that the hook is
lightly hooked in the edge of the fish's mouth, & you run a chance of
having it pull out at any second. Try to bring in & make a
quick shot at netting. Do not try to net a fish that is deeper than
VERY CLOSE to the top & remember that these fish have no reverse, but they
can turn very quickly.
As soon as the netter has the fish in the net, strip of 6 feet or so of line
so the rod tip will have a better chance of survival during the excitement when
the net & fish are brought into the boat.
RELEASING
A FISH ; If your fish is one that the
regulations say is illegal, in that is is not adipoise fin clipped, then you
will have to release it unharmed without taking it out of the water. In
this case you should not tire the fish unduly, but get it in as fast as possible
to ensure that it has a good survival. There are a couple of ways to
go here. A hook release can be used. This is like a small gaff
hook with no sharp point on the end. In use, when the fish is close
to the boat & tired enough that you can grasp the leader a foot or so from
the fish, use this hook remover by reaching out & hooking the
line. Next bring the remover close to the fish, & with the
other hand holding the leader, quickly raise the hook remover handle while at the same
time lowering the hand holding the leader. What this does is raises the
fish's head into the remover, but reversing the hook & putting the weight of
the fish to unhook itself.
Depending on the size & specie of the fish, & whether it is tangled
in the leader, you may have to net it, but keep it in the net tight against the
side of the boat. Unhook it & tip it out of the bag without
bringing it aboard. For a link to an article on releasing fish CLICK
HERE.
DOWNRIGGER WIRE AROUND THE
PROP ; Needless
to say this is to be avoided if at all possible. For those of you who use the main
motor for trolling at times, I recommend the "Sting Ray" type stabilizer fin
that is attached to the cavitation plate. Your boat / engine may not need it's
advertised usage of "getting out of the hole faster", but let me tell you, these fins sure make something for you to lay on
when the motor is tipped up & to have something to hang onto while someone else hangs onto your feet while you unwind the wire off the prop. Especially when you are 15
miles out in the Pacific Ocean & it is rather choppy. You may say it won't
happen to me, but if you fish with downriggers enough the odds are against you.
Also carry a spare spool of wire, crimpers, sleeves & an extra weights.
If you run the spectra type lines & get that around the
prop shaft, you will very likely be in for problems of tit cutting the shaft
seals out if allowed to run even for a very short time.
Compiled by LeeRoy Wisner. Some of the above information
has been gleaned from many sources, and 50 years of personal salmon fishing, with special
thanks to John Keizer, Tom Nelson, Tom Pollack & Dick Pool.
This started out as simply a leader length behind flashers
list, but seems to have grown into a general salmon trolling page.
Copyright © 2004-2005 LeeRoy Wisner All Rights Reserved
Originated sometime 1997, Last modified 12-30-2005
to
contact the author click here
|